Monday, February 26, 2018

Ese torrent ni iki? Bikora bite?

Ese wari uziko abantu basaga miliyoni 27 burikanya baba barimo gukoresha imbuga zishakishirizwaho torrents?

Ubwamamare bya torrent ni inyungu kuri wowe, jyewe ndetse nabandi bose baba bashaka kumanura(Downlaod) ama filime,ibitabo,indirimbo ndetse nibindi,

Niba ujya ugira amatsiko yo kumenya uko ibi ibyo aribyo ndetse nukuntu  bikora, aha uri niho honyine wabimenyera, nubikunda ubisangize abandi ukanda kuri share.

Torrenting ni iki?


Benshi bakunda kwitiranya Torrent na Bittorent bakabifata kimwe kandi mu byukuri ari ibintu bibiri bitandukanye ariko bidahabanye,Torrent ni file iba igizwe namakuru afite aho ahuriye nicyo wowe ushaka ku downloading kuri internet.mu rundi rihande,Bittorent ni uburyo bwifashishwa mukugabanya file nini muduce duto cyane kugirango abashe gukoreshwa byoroshye (File Transfer Protocol)

Ikiza kiyi protocal nuko igufasha kubona file uyikuriye ku isoko yato (Source) cyangwa ukayivana kubandi bayifashe. ibi bikaba byiza kuko bidufasha mu gukora download byoroshye.

Ni gute Torrent zikora?


Torrents zikora mu buryo bwa decentralized aho file iva hejuru kuri seeder(Uploader) ikajya kubandi.

Ishusho iri hasi igaragaza abantu barindwi  (users) numu seeder umwe (uploader). file yohererezwa umu leacher (Downloader) umwe bwa mbere ubundi ikagera kubandi binyuze kuri we.

Reka turebe  amwe mu magambo akoreshwa muri Torrenting ndetse nicyo ashatse kuvuga.

  • Peers: Ni term ikoresha umuntu(user) cg igikoresho (Device)  irimo gukoresha itumanaho rya Peer-to-peer(P2P).

  • Swarms: Iri ni itsinda ryabantu baba barimo gukoresha torrent imwe bayihuriyeho.

  • Seeders: Mu gihe urimo ku downloading ndetse ukora na upload muri icyo gihe uzitwa umu seeder.

  • Leechers: Mu gihe ukora download gusa wahagaritse upload witwa umu leacher ariko bikaba byaba byiza ubaye umu seeder kuko aba Trackers bahagarika abantu baba leechers.

  • Indexers: Ni imbuga shakikirizo zivaho ama torrents.

  • Trackers: Ibi wabyita nkibiraro hagati ya peers aho bifasha mukubona torrents

  • BitTorrent Clients: Izi ni porogaramu zigufasha kumanura(Download) ndetse no gukora management ya torrents zawe (Download,start,stop,pause etc....)


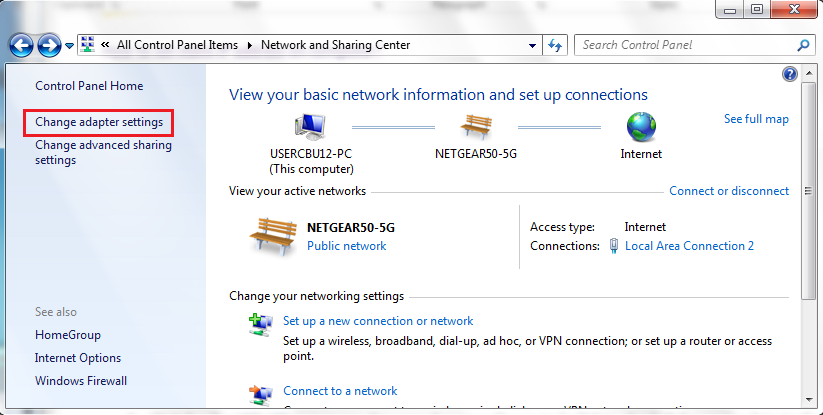
Uburyo bwo gukoresha Torrents


Gukoresha torrents biroroshye cyane kurusha uko wowe waba ubyumva ko bikomeye.

 1: Manura (download)  Torrent Client


Bitwe nubwoko bwa operating system ukoresha usabwa kumanura porogaramu izajya igufasha mu kumanura izindi torrents urugero nka qbTorrent,uTorrent,bitcomet etc.....

.

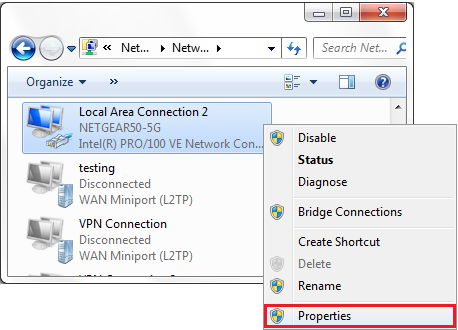
 2: Shaka Torrent File


Wifashishije imbuga zishakirwaho ama torrents nka kickass,Piratesbay nizindi shaka torrent ushaka kumanura.

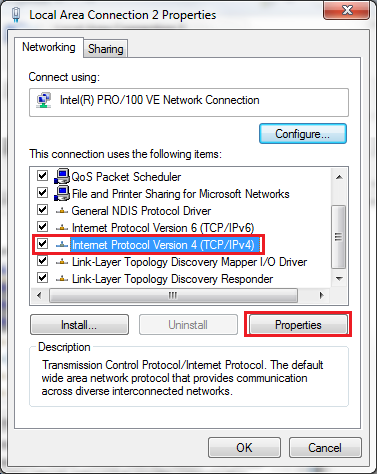
3: Shyira ya torrent muri porogaramu iyifungura(Torrent Client)


Niba umaze kubona torrent ushaka, icyo uba usabya ni ukuyikandaho hanyuma ugakanda kuri BUTTON ikubwira ngo uyimanure, aha izahita ifungukira muri torrent client wowe wahisemo nurangiza uyishakire aho ushaka kuyibika.

Ubu akaba aribwo buryo wakoresha umanura ama torrents.

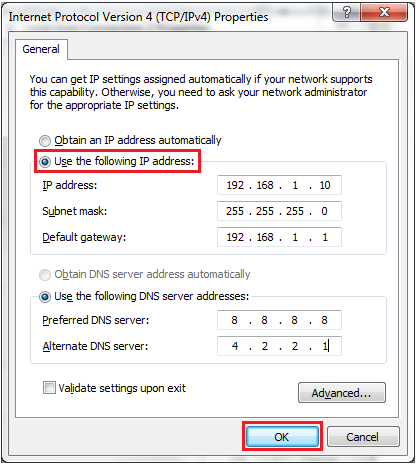
Iyi shusho iragaragaza uko bigenda muri make ibi twavugaga hejuru.
what-is-torrenting-and-how-does-it-work

 Torrenting byemewe n'amategeko?


Bitewe naho uherereye gukoresha torrent biremewe cyangwa ntibyemewe kuko nko muri Switzeland,Netherland,spain etc.... biremewe mu gihe ibyo wamanuye utazabikoresha munyungu bwite.

Ariko mubindi bihugu gukoresha torrents bihanwa namategeko agenga imikoreshereze y'ibyubuhanga mu byubwenge (Intellectual propert/Copy rights)

Gukoresha Torrent Ntabwo byemewe n'amategeko muri rusange.


Ni gute wa  Torrenting mu mutekano?

Uburyo bwiza bwo gufatwa mu gihe ukoresha torrent ni igihe ukora IP address zawe za nyazo.

Tumaze kurebera hamwe ko gukoresha torrent bitemewe namategeko, rero uburyo bwo gukoresha torrent mu mutekano nta wuguketse ni ugukoresha VPN.

Muri post yacu ikurikira tuzabasobanurira neza VPN icyo aricyo ndetse tubahe na zimwe muri VPN ushobora gukoresha.

Dukurikire kumbuga nkoranyambaga kugirango uzabe uwambere kubona indi post

[button color="red" size="small" link="https://www.facebook.com/getrwanda" icon="" target="true" nofollow="false"]Facebook[/button]

[button color="red" size="small" link="https://twitter.com/getrwanda" icon="" target="true" nofollow="false"]Twitter[/button]


Saturday, February 17, 2018

How to create static IP address

Most users will not need to set a static IP, however it is necessary if you need your computer to retain the same IP address each time you boot up. For more information on static vs. automatic (dynamic) IP addressing see the Google support answer Static vs. dynamic IP addressing.

To set a static IP on your Windows computer:

  1. Click Start Menu > Control Panel > Network and Sharing Center. (For Windows 8 and higher, search for and open Control Panel and select Network And Internet).

  2. Click Change adapter settings.


  3. Right-click on Local Area Connection and click on Properties.


  4. Select Internet Protocol Version 4 (TCP/IPv4) and click on Properties.


  5. Select "Use the following IP address" and enter the IP address, Subnet Mask, Default Gateway. and DNS server. Click OK and close the Local Area Connection properties window.


Wednesday, January 24, 2018

If you’re using an Android phone, Google may be tracking every move you make

Daniel Filip, Tech Lead Manager for Google Maps, operates the Trekker, a 15-camera device, with his phone while mapping the Inca citadel of Machu Picchu for Google Street View in Cuzco, Peru, August 12, 2015. Picture taken August 12, 2015.  REUTERS/Pilar Olivares - GF10000254738

Biking? Google probably knows you are. Up a mountain? It probably knows that, too.

The Alphabet subsidiary’s location-hungry tentacles are quietly lurking behind some of the most innovative features of its Android mobile operating system. Once those tentacles latch on, phones using Android begin silently transmitting data back to the servers of Google, including everything from GPS coordinates to nearby wifi networks, barometric pressure, and even a guess at the phone-holder’s current activity. Although the product behind those transmissions is opt-in, for Android users it can be hard to avoid and even harder to understand. Opting in is also required to use several of Android’s marquee features.

As a result, Google holds more extensive data on Android users than some ever realize. That data can be used by the company to sell targeted advertising and to track into stores those consumers who saw ads on their phone or computer urging them to visit.1 This also means governments and courts can request the detailed data on an individual’s whereabouts.

While you’ve probably never heard of it, “Location History” is a longtime Google product with origins in the now-defunct Google Latitude. (Launched in 2009, that app allowed users to constantly broadcast their location to friends.) Today, Location History is used to power features like traffic predictions and restaurant recommendations. While it is not enabled on an Android phone by default—or even suggested to be turned on when setting up a new phone—activating Location History is subtly baked into setup for apps like Google Maps, Photos, the Google Assistant, and the primary Google app. In testing multiple phones, Quartz found that none of those apps use the same language to describe what happens when Location History is enabled, and none explicitly indicate that activation will allow every Google app, not just the one seeking permission, to access Location History data.

Quartz was able to capture transmissions of Location History information on three phones from different manufacturers, running various recent versions of Android. To accomplish this, we created a portable internet-connected wifi network that could eavesdrop and forward all of the transmissions that the devices connected to it broadcast and received.2 None of the devices had SIM cards inserted. We walked around urban areas; shopping centers; and into stores, restaurants, and bars. The rig recorded every relevant network request3made by the Google Pixel 2, Samsung Galaxy S8, and Moto Z Droid that we were carrying.

According to our analysis of the phones’ transmissions, this is just some of the information that gets periodically sent to Google’s servers when Location History is enabled:

  • A list of types of movements that your phone thinks you could be doing, by likelihood. (e.g. walking: 51%, onBicycle: 4%, inRailVehicle: 3%)

  • The barometric pressure

  • Whether or not you’re connected to wifi

  • The MAC address—which is a unique identifier—of the wifi access point you’re connected to

  • The MAC address, signal strength, and frequency of every nearby wifi access point

  • The MAC address, identifier, type, and two measures of signal strength of every nearby Bluetooth beacon

  • The charge level of your phone battery and whether or not your phone is charging

  • The voltage of your battery

  • The GPS coordinates of your phone and the accuracy of those coordinates

  • The GPS elevation and the accuracy of that


“That goes beyond what you’d expect for Location History,” Bill Budington a security engineer for the Electronic Frontier Foundation, told Quartz when these transmissions were described to him, “especially in terms of predicted activity.” The EFF is a nonprofit organization that advocates for digital civil liberties, freedom, and privacy, which both I and Google have made charitable contributions to in the past.4

Google, accurately, describes Location History as entirely opt-in. “With your permission, Google uses your Location History to deliver better results and recommendations on Google products,” a spokesman wrote to Quartz in an email. “For example, you can receive traffic predictions for your daily commute, view photos grouped by locations, see recommendations based on places you’ve visited, and even locate a missing phone. Location History is entirely opt-in, and you can always edit, delete, or turn it off at any time.”

When asked to opt in, however, the full implications of enabling Location History are rarely made clear. Here are some of the ways Google apps ask users to enable Location History.

Google Photos


How Google Photos asks to turn on Location History

When the “Places” album is selected, the app requests to turn on Location History. The prompt says that Location History will allow you to “see photos grouped by where you’ve been.” It doesn’t say anything about Google using that information for other purposes. It doesn’t mention that in exchange for organizing your photos, you let Google record what stores you’re shopping in and what restaurants you’re eating at by collecting information about nearby Bluetooth beacons and wifi networks. There is no option to limit Location History to only be used for sorting photos.

Google Maps


maps_Screenshot_20180116-075155

In Google Maps, users are encouraged to “Get the most from Google Maps” by turning on Location History. “Google needs to periodically store your location to improve route recommendations, search suggestions and more,” the full-screen prompt explains. Those suggestions come in exchange for Google knowing how often you go for a run and how often you charge your battery.

Google App


now_Screenshot_20180116-121002

In the primary Google App, the prompt to turn on Location History occurred almost immediately on one of the Phones we tested. On another, it only appeared when trying to activate information about local road traffic. Tapping “Learn More” reveals that Google plans to use this information not just for aiding a commute, but also to give you “more useful ads on and off Google.”

Google Assistant


Screenshot_20180118-202742

On first use, the Google Assistant’s activation screen immediately makes Location History look like a requirement. “The Assistant depends on these settings in order to work,” the screen says, describing Location History as creating a “private map of where you go with your signed-in devices.”5 It makes no mention of sharing your wifi connection, only that it will “regularly obtain location data from this device, including when you aren’t using a specific Google product.” Allowing these permissions is required to activate Google Assistant, although if Location History is disabled after Google Assistant is set up, the assistant will still function and does not seem to prompt for it to be re-enabled.

Google Assistant is of strategic importance to the company’s efforts to keep users in its ecosystem of devices, apps, and services rather than those of Apple, Amazon, or Microsoft. Most recently, all of these companies have been focused on in-home appliances that respond to voice and can assist with various routine tasks like playing music, calling a taxi, or ordering laundry detergent.

Your Location History


Android users can check some of the information Google has collected about them by looking at “Your timeline” in Google Maps. (Google’s information page on how to access it can be found here.) These instructions show how to turn off Location History entirely.


Source : qz.com

Top 10 Best Text Editors For Programming 2018

If you wrote a script of 2000 lines then you instantly run your script but you get an error message saying error in line 1024. There is no issue to fix the error but what you just realized how you are gonna find the line 1024!!, and that is some situation when a text editor helps you. It has a lot of features during code writing, that make you write code efficiently. It helps you to write error free code.

Text editors have such ability to recognize, what is variable or function and Accordingly it shows them in different colors and this is just a basic feature about code editor, you will find lot more after checking the list below. Not even for beginners it helps pro programmers to code nicely and expedites. The best part about code editors is, it almost supports all languages so you don’t have to worry, you just have to create a file with proper extension.

Now without wasting your time let’s jump into the top 10 best Text editors list:

Sublime Text


Sublime Text Code Editor

It’s a well-turned and sophisticated text editors for writing good quality and error free code. It has Multiple selections that allow you to interactively change many lines at once, rename variables with ease, and manipulate files faster than ever.

It has powerful python based API with Python console to interactively experiment in real time. It is a lightweight text editor which supports on Windows, Mac, and Linux.

Features of Sublime Text

  • Almost everything in Sublime Text is customizable with simple JSON files.

  • Powerful Python based plugin API to experiment in real time.

  • Available for OS X, Windows, and Linux.

  • Make multiple changes at the same time.

  • Multi-platform supported.

  • Full-screen mode to get rid of pop-up notification and to concentrate on Code writing.


Atom


atom text editor

If you are one of those who does not like restrictions in their work/ programming then this is the right text editor for you. Atom is a fully customizable text editor, so you can do anything with it by choosing different packages to add new functionality and features to it.

You don’t have to worry about which platform you are using if you are willing to using this text editor because it works on Windows, Mac, and Linux as well.

Features of Atom

  • Autocompletion during writing code to help you write code faster and flexibly.

  • File system browser to Easily browse and open a single file, a whole project, or multiple projects in one window.

  • Compare and edit code across different files by using multiple panes.

  • Atom Works across operating systems( OS X, Windows, or Linux).

  • Find and replace any text in a single file or the whole project.

  • Installation of new packages according to your need.


Coda


Coda is one of the paid text editors for Mac. Because it’s specialized for Mac so it has so many features that would like to try if you are a Mac user.

Syntax highlighting on Coda is much faster than any other text editor. You can preview your code in real-time. Coda has too many rich utilities that make your work better.

Features of Coda

  • It has side-wide autocompletion of variables, classes, functions, it all done with the help of by local indexed files.

  • You can edit and preview the site CSS in real time.

  • Track and publish files modified outside of Coda.

  • Manage existing plugins or discover new by Coda’s plugin preferences.

  • Easy and fast switching between tabs.


Notepad++


notepad plus plus

Notepad++ is a free source text editor that helps to write programs in an easy way. It has such powerful editing component  Scintilla, it helps and supports during editing, debugging code indicates errors and much more. This text editor is purely written in C++. It uses pure Win32 API and STL which ensures a higher execution speed and smaller program size for every code you write.

You can change the editor language to your native language just by downloading and updating the XML file.

Features of NOtepad++

  • Very lightweight and starts rapidly.

  • Macro recording and playback support.

  • Multi-Document or Tab interface to work on multiple tabs.

  • You can Launch it with different arguments.

  • Auto completion on words, functions, parameters with hints.

  • Zoom-in and out.

  • Syntax highlighting and folding.

  • You can add Bookmarks for future concerns.


Vim Text Editor


vim text editor

Vim text editor


Vim is a powerful and portable text editor. With its bunch of advanced features, you can handle it pretty well to get your program done in very efficient and easy way. It works in Windows, macOS, and Android.

The developers behind this text editors keep on updating Vim and adding new features to it with every update.

Features of Vim

  • Very lightweight and fast.

  • Extensive plugin system

  • Powerful search and replace for text.

  • Integrates with many other tools.

  • It Supports hundreds of programming languages and file formats.

  • Works well for remote machines with slow connections.


Visual Studio Code


visual studio code

It is a free Text editor developed by Microsoft. It is released in April 2015. Visual Studio Code has built-in debugging tools for Node, TypeScript, and JavaScript and other languages. It supports on Windows(10,8,7), Mac(10.9+), Linux(Debian, Ubuntu, Fedora, SESU).

Features of Visual Studio Code

  • It has Smart completions based on variable types, function definitions, and imported modules.

  • You can Debug with breakpoints, call stacks, and an interactive console Using its advanced debugging.

  • Supports a variety of languages to run and debug like CSS, Perl, PHP, Go, Clojure, HandleBars, Jade, Python, C++, F#, SQL, Lua, Typescript, Dockerfile etc.


UltraEdit


It is a multi-platform text editor for web development, text editing, system administration and desktop development. It is a Bunch of Incredible features to handle sophisticated software and web development projects. It has very flexible and customized interface. Even it is a paid text editor but you can take trail as well.


Features of UltraEdit

  • Multi-platform- Windows, Mac, and Linux.

  • Able to open and edit very large files without any crash.

  • File compare and data sorting.

  • Syntax highlighting for almost every programming language.

  • Integrated FTP, SSH and telnet client.

  • Multi-select to copy or edit on every row you select at the same moment.

  • Column mode to add or edit code at the same time.

  • Auto closing on XML/HTML tags.


BlueFish


Bluefish text editor

Bluefish text editor


Bluefish is one of the Worthwhile text editors towards programmers and developers worldwide. So far, its five versions have been launched, Every time it comes with new features and improvement in it. It is multi-platform and runs on most of the desktop operating systems including Linux, FreeBSD, MacOS-X, Windows, OpenBSD, and Solaris.

Features of Bluefish

  • Very fast and lightweight, Loads hundreds of files within seconds.

  • Multiple document interface to open more than 1000+ documents simultaneously.

  • undo or redo functionality.

  • Auto-recover after any system crash, Kill or shutdown.

  • Available full-screen editing.

  • you can save your documents with any desired encoding.

  • Bookmarking.

  • Easily Open file based on content patterns.


Brackets


Brackets Code editor

Brackets Text editor


Brackets is another open source text/code editor with proper visual tools and preprocessor. It is very lightweight and sufficient for a beginner programmer. With a lot of functions as real time editing preview and some features, it is a complete hub for a programmer.

Features of Brackets

  • Advance Inline editor.

  • Live preview of changes on your code.

  • Live Highlight with LESS and SCSS files.

  • Magnification Preprocessor support.


CodeRunner


If you are a Mac user then, i am sure CodeRunner is for you. It’s a purely  Mac based text editor, supports large amount of languages. It is very lightweighted and Working on CodeRunner it very ingenue. With so many reliable features it also provides the easily and fully customizable templates to each language.

Features of CodeRunner

  • Nailing Textmate theme support.

  • File and Symbol Navigator.

  • Very Intractive console .

  • Automatic identation support.

  • Intelligent bracket matching.

Monday, January 22, 2018

How to Activate Windows and Office?

KMSAuto Lite: Supported Windows and Office Editions and Build-in Functions


From the table below, you will know that this KMSAuto activator is able to support all the latest Windows and MS Office volume-licensing editions. So, it definitely worth a look!

Free Download and Use the KMSAuto Lite Latest Version


  1. You are advice to temporarily disable the antivirus (including Windows defender and firewall) on the PC that you wish to run the activator. To do so, just right-click the antivirus icon on the right-bottom corner of the screen and choose disabled.

  2. Also, you can remove any other activators or older version of this KMSAuto before getting the new one.

  3. Download the latest version of KMSAuto Lite here.

  4. Extract the zip file using the unzip programs such as WinRaR to the computer desktop.

  5. Double-click on the KMSAuto Lite Portable 1.3.2 folder on the desktop and right-click on the .exe and click Run as administrator.


KMSAuto Net 2016 VS KMSAuto Lite Portable


While searching for free Windows activation tools, you may also encounter the KMSAuto Net 2015 activator. What is this and how the program differs from the KMSAuto Lite?

If you are confused about the two applications/activators, there are come from the same Russian developer. The program functionalities are almost same and I would say that the KMSAuto Lite is the upgrade version of KMSAuto Net since there is the improvement on the user interface.

Just in case if you like the KMSAuto Net 2016 v1.5.1, you can freely download the activator here.


How to use the Tool to Activate Windows and Office?


When you start the program, you will see three big buttons: “Activate Windows”, “Activate Office” and “Information”. The interface is pretty simple and understandable.

To activate Windows, click on the Activate Windows button. The activation process will start and you will see the following screen. The following screen show that the activator was successfully activated the Win 10.


kmsauto lite

Also, if desired, you can switch the program to the advanced mode – this is done by clicking on the Install GVLK option, where you can insert the Windows or Office product key (if you have). You also can choose the Scheduler option to schedule the reactivation of the programs.

Please note that this tool is able to activate all Windows Volume Licensing (VL) editions but unable to activate Win 7 Ultimate and hence it has a feature to convert the Win 7 Ultimate to other Win 7 versions (under the program Tools tab). You also can convert the retail-edition of Office 2010/2013/2016 to the volume licensing.

In addition, the activator has a function of backup and restores the activation (at the case, if you have activated it by phone). You also can use it to activate the latest OS, Win 10.

kmsauto lite tools

Activate Microsoft Office Using the KMSAuto Lite


Apart from activating Windows, the KMSAuto Lite also can be used to activate Microsoft Office including version 2010 and 2013. It is also easy to use the activator, as you just press a button and all done.

To activate Microsoft Office, click on the Activate Office button. The activator will automatically detect and activate the copy of Office installed on your PC.


Conclusion: It’s a Lite and Reliable Tool!


Whether you like it or not, every copy of Windows and Office required activation before you can use the full functionalities of the programs. This article provides you a great tool that you can download and use the activator as you wish.

There maybe more than one way to activate your system but generally, the KMS activation is safe and fast. The activation become easier with the free tool provided and you also can save the cost of buying the Windows license.

Finally, the KMSAuto Lite activator and its modules have been tested clean on virustotal. Well, it does not add, change, or delete any system files of your PC that may harm or give your computer problems. You are safe to use the tool even some of the antivirus may still alert it.

So, if you do not have a legit Windows product key or serial number for activation purpose, you definitely can download and use this great tool (for education purpose, once you are affordable please support the software developer).

Steps To Change Serial Number of Your Android:

The method is quite simple, and you just need a rooted Android device that will allow the Xposed installer to run on a device. And after having the Xposed installer, you will have to use Xposed module app to change a serial number of your Android. For this follow the guide below.

Step 1. First of all, you need a rooted Android as Xposed installer can be only installed on a rooted Android, so Root your android to proceed

Step 2. After rooting your Android device, you have to install the Xposed installer on your Android, and that’s a lengthy process, and for that, you can proceed with our Guide to Install Xposed Installer On Android..

Change Serial Number of Your Android

Step 3. Now after having the Xposed framework on your Android, the only thing you need is the Xposed module Serial Number Changer that will allow you to change the serial number of your Android device.
Change Serial Number of Your Android

Change Serial Number of Your Android


Step 4. Now install the app and launch it on your Android and you just need to provide super user access to the app to proceed, and after that, you need to reboot your Android device for the proper working of the Android. Now launch the app and then enter the serial number that you want to set on your device.
Change Serial Number of Your Android

Change Serial Number of Your Android


Step 5. Now you need to reboot your device and then go to Settings > About Phone > Status > Serial Number to find out if your serial number had changed or not.
Change Serial Number of Your Android

Change Serial Number of Your Android


So this is all about How To Change Serial Number Of Android. By using this easy method, you can easily fake out the device identity. So must try this out on your device. Hope you like this, do share with others too. Leave a comment below if you have any related queries with this.


How To Install Xposed Framework In Android (2 Methods)

We all know, Xposed installer provides a platform to run lots of cool tweaks on your Android device. So have a look on the complete guide for installing Xposed Framework on your Android.

Xposed Framework is the most powerful tool that Android user must try after rooting their Android. Xposed Framework can be better compared as a Cydia for iOS with the help of which you can add lots of new features to your device. The Xposed installer provides a platform to run lots of cool tweaks on your Android device. Till now we had discussed lots of tweaks that you can do after installing Xposed Framework. So have a look on the complete guide for installing Xposed Framework on your Android.

The method is very simple and the only thing you need is a rooted Android that will allow you to install the apk of Xposed Framework with a super user grant. So follow up the steps below to proceed.

Modules That Will Work After Installing Xposed Framework


  • Burnt Toast

  • CrappaLinks

  • Play Store Changelog

  • XXSID Indicator

  • Greenify

  • Amplify

  • YouTube adaway

  • Xposed GEL Settings (beta)

  • Cool tool

  • NotifyClean

  • Min min guard

  • BootManager

  • ReceiverStop

  • EnhancedToast

  • Force immersive mode

  • Swype Tweaks

  • Swipeback 2

  • Spotify skip

  • Lollistat

  • Flat Style Keyboard

  • Force Fast Scroll

  • Flat style colored bars

  • Materialised xposed (working for some)

  • App settings

  • Lockscreen music art remover

  • NetStrenght

  • LWInRecents

  • Screen Filter

  • BubbleUPNP’s Audio cast

  • Snapcolors 3.4.12


Partially working modules:

  • Gravity box (very limited)

  • XBridge

  • Boot manager (working for some)


#1 Install Xposed Framework On Android By Flashing Zip


Step 1. First of you need a rooted android and for that, you can follow our guide easily root your device

Step 2. Now  you need to check your CPU architecture to get the perfect Xposed framework for you and for this you will use app Hardware Info.

Step 3. Now you need to get the custom recovery in your android and for that, you will need to search your device’s respective custom recovery and you can flash it using the app ROM Manager.

[caption id="" align="alignnone" width="300"]Install Xposed Framework In Android 
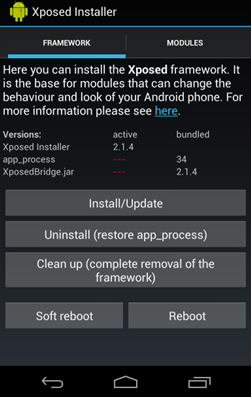
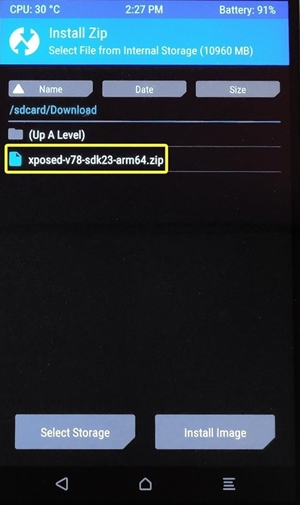
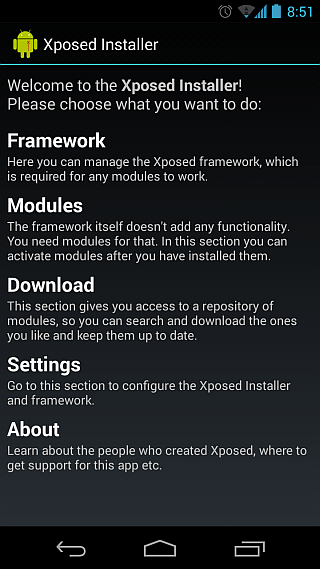
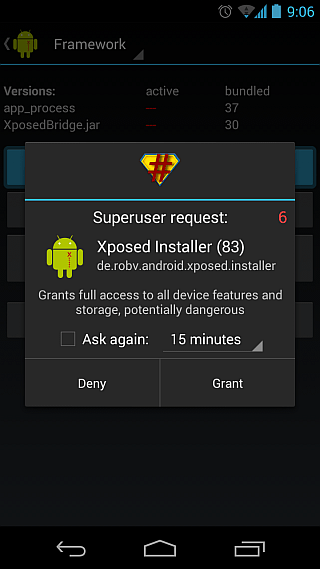
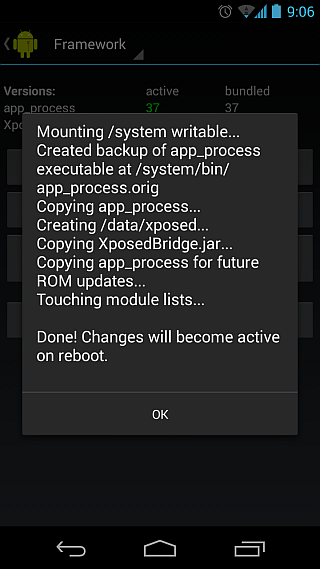
Install Xposed Framework In Android[/caption]

Step 4. Now you have to select the zip file of the Xposed framework according to your CPU architecture and you can get Xposed Framework zip from HERE.

Step 5. Now flash this zip file through your Android recovery. And when the zip is being flashed, then simply reboot your device.


Install Xposed Framework In Android

Install Xposed Framework In Android


Now you will have Xposed Installer installed on your device and now you can try lots of cool tweaks on your Android and some of the cool tweaks we had discussed below that you can try.

If the above method doesn’t work for you or you are facing any compatibility issue then you can go for the below method.

#2 Installing Xposed Installer Directly From Apk


Step 1. First of all, you need to download the latest Xposed Framework installer app.

Step 2. Now install the Xposed Installer app from your app drawer. Once opened, you will see the screen like below. Select Framework.


 Installing Xposed Installer Directly From Apk

Installing Xposed Installer Directly From Apk


Step 3. Now you need to tap on “Install/Update” button.


Installing Xposed Installer Directly From Apk

Installing Xposed Installer Directly From Apk


Step 4. Now you might have to wait for few seconds until you see the “Superuser request” simply Grant it.


Installing Xposed Installer Directly From Apk

Installing Xposed Installer Directly From Apk


Step 5. The framework will install by itself and once done, you will see the screen like below. Simply tap on OK.


Installing Xposed Installer Directly From Apk

Installing Xposed Installer Directly From Apk


Now reboot your phone. That’s it! You are done.

So above is all about How To Install Xposed Framework In Android. With this, you can easily install a cool tweaker in your Android device and you can add lots of new features using this. So try this and have fun by adding all new features on your device. Hope you like this cool solution, do share with others too. Leave a comment below if you have any related queries with this.